In this post I will try to outline the capabilities of the Common Format Designer (CFD) which can be used in Creating Data Models in ODI 12c. CFD can be used to quickly design a data model, forward engineer a database schema and generate a default data flow between data models.
Oracle Data Integrator (ODI) is Oracle’s flagship product on data integration. In 12c a lot of things get “cleaner”, easier to understand and better documented. Like many other Oracle products, it comes loaded with a heavy arsenal of advanced features and functionalities which are however sometimes hidden, or difficult to map to actual customer needs, especially on your first go at the tool.
The tasks commonly done with CFD are:
- Designing and Creating a new Data Model from scratch
- Assembling the new Data Model using datastores of other existing Data Models
- Visualizing and creating the datastores and their inner relations
- Generating the DDL statements to forward engineer a Data Model to the related data source (database)
- Generating Mappings (11g Interfaces) to implement bidirectional data flow between the new Data Stores and the ones used to create them.
In what is often a typical scenario, we have a source database which needs to be replicated in a staging area, before transforming, enhancing, validating, combining with other data sources and moving the data somewhere else (perhaps a data warehouse).
The steps to implement this could roughly be the following:
- Create a staging area mirroring the table structure of the source database (only for the required tables)
- Create the ODI Data Models for the Source and Staging Area Database.
- Create mappings to move the data from the source to the staging area.
- Enable Journalization so that only new and changed data are processed each time the mappings are executed
- Orchestrate the mappings using Packages and Schedule Executions whenever and as often as required.
Steps 1, 3 & 4 can be standardized and accelerated by using the Common Format Designer.
Instead of manually creating the staging area schema tables, using reverse engineering to create the ODI Data Model and manually creating mappings between the source and staging datastores, the following process can be followed:
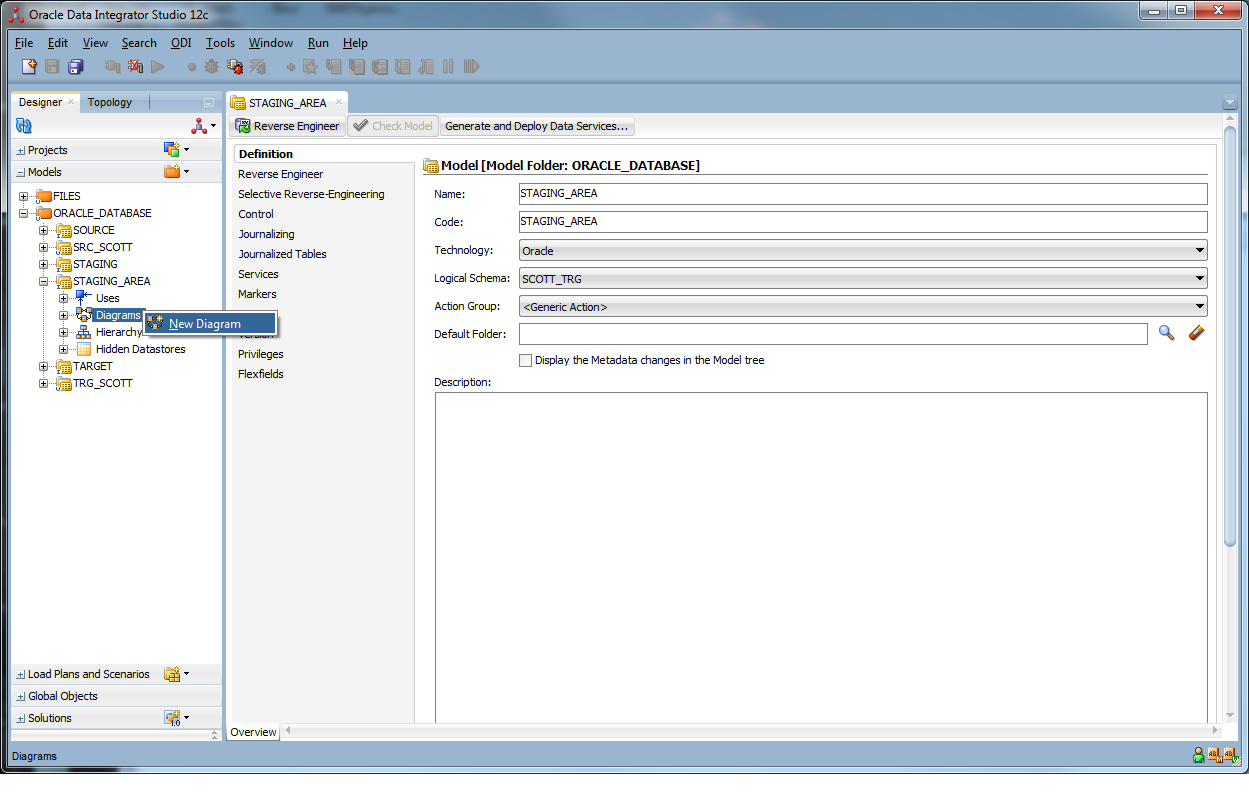
1. Create the Staging Area Data Model
Create a new Data Model to host the Staging Area Datastores. In the new Data Model create a new Diagram, as displayed below:
Drag the required datastores from the Source Model and drop them in the newly created Diagram. After each individual drop all modified objects should be saved.
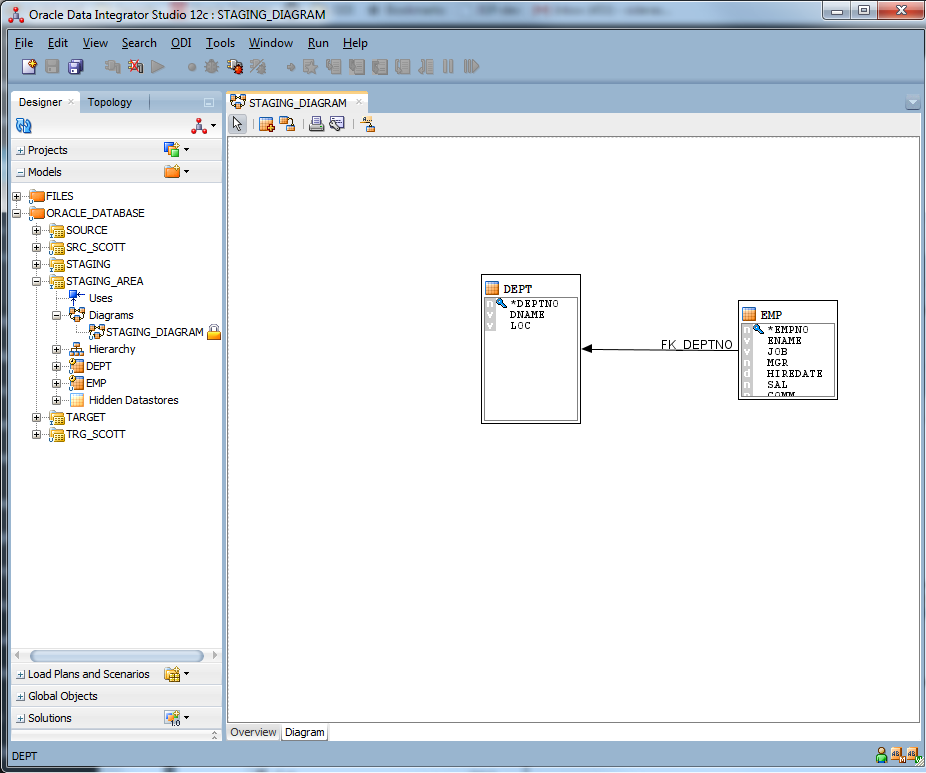
As seen in the above image, when the source datastores are droped in the Diagram and saved, the new datastores are created under the Staging Area Model, and displayed in the Diagram.
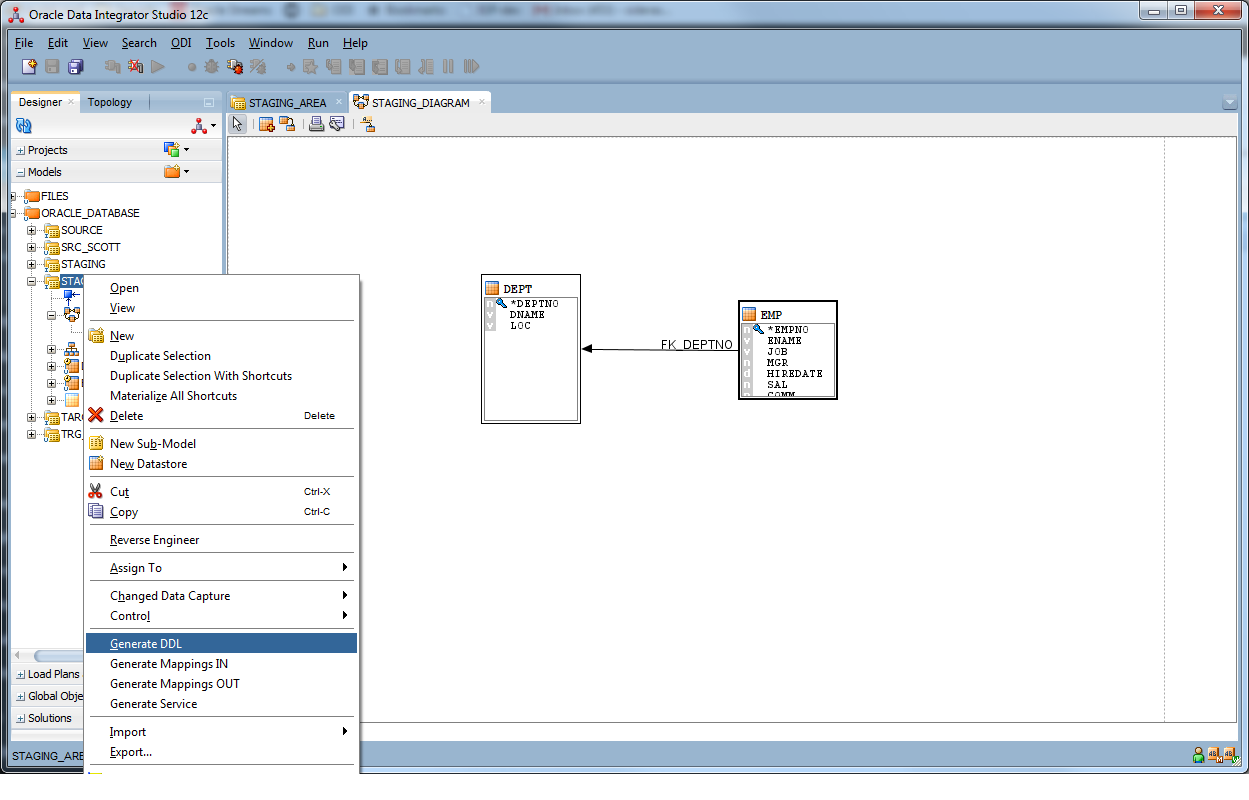
2. Create the Staging Area Database Table Structure
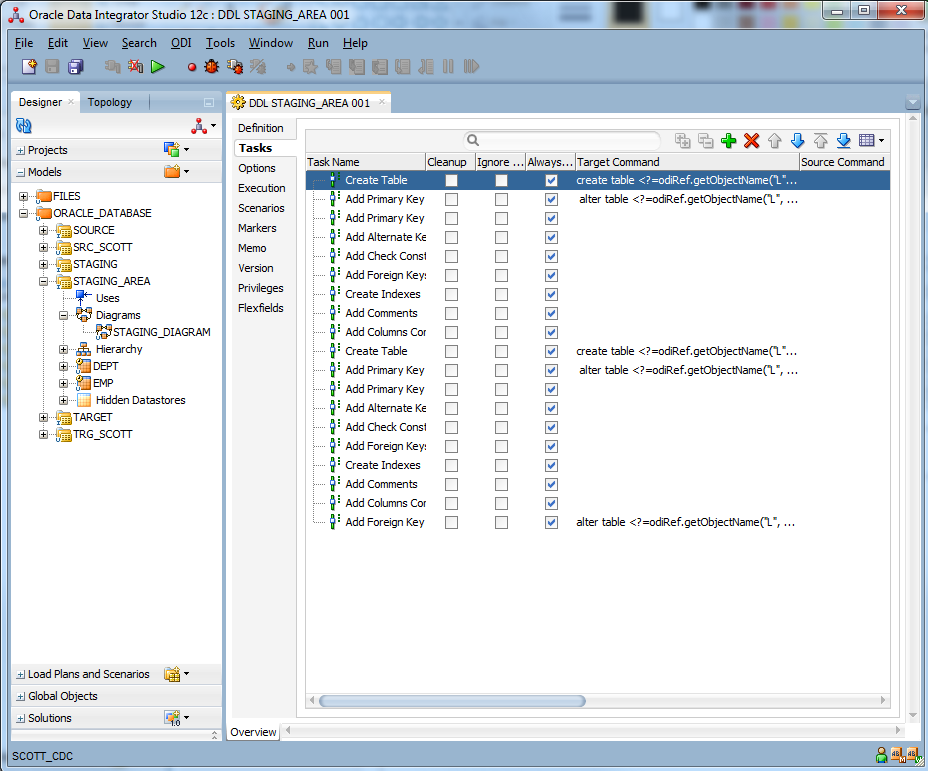
When the Data Model in ODI is complete, ODI can generate the DDL script that created the specific model. To do this right click on the Staging Area Model and select Generate DDL.
Once the required processing is complete, the Generate DDL wizard window is displayed. In the Wizard, all differences between the Model and actual database schema are listed. The user needs to select an ODI Project and Folder where the new procedure holding the DDL script will be created and choose the objects to be synchronized.
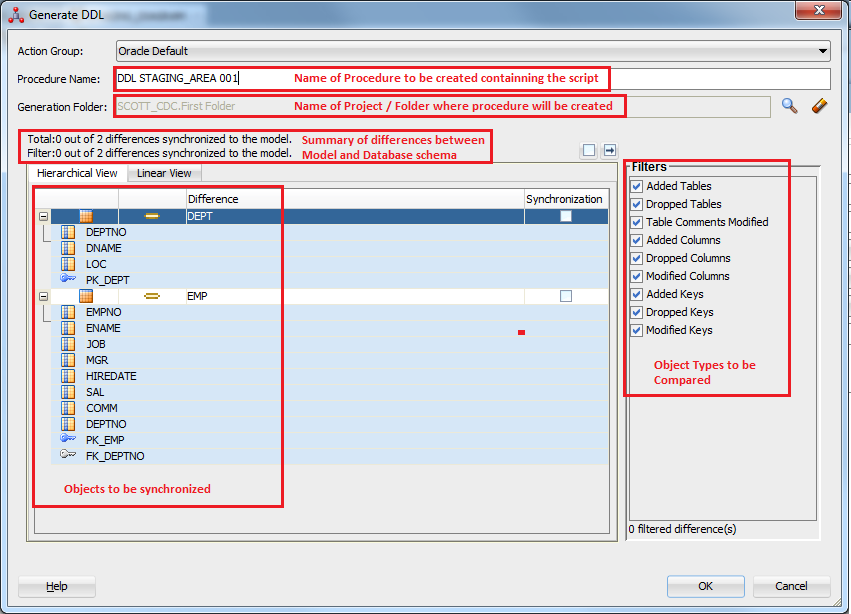
The newly created procedure contains all the required steps to synchronize the database schema with the ODI Data Model.
The procedure can either be directly executed through ODI Studio against the target environment, or orchestrated and scheduled the execution in a Scenario / Load Plan.
The same process can also be used to synchronize modifications of the Data Model to existing database tables. This will help you in keeping your ODI processes up to date after they go live.
2. Generate Mappings to implement the Data flow between Source and Staging Area schemas
Right click on the Staging Area Model and select Generate Mappings IN
In the Wizard window, select the datastores for which mappings should be generated, as well as the Project folder where the mappings will be saved
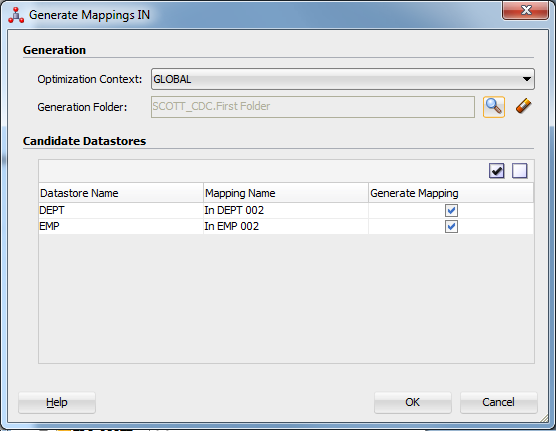
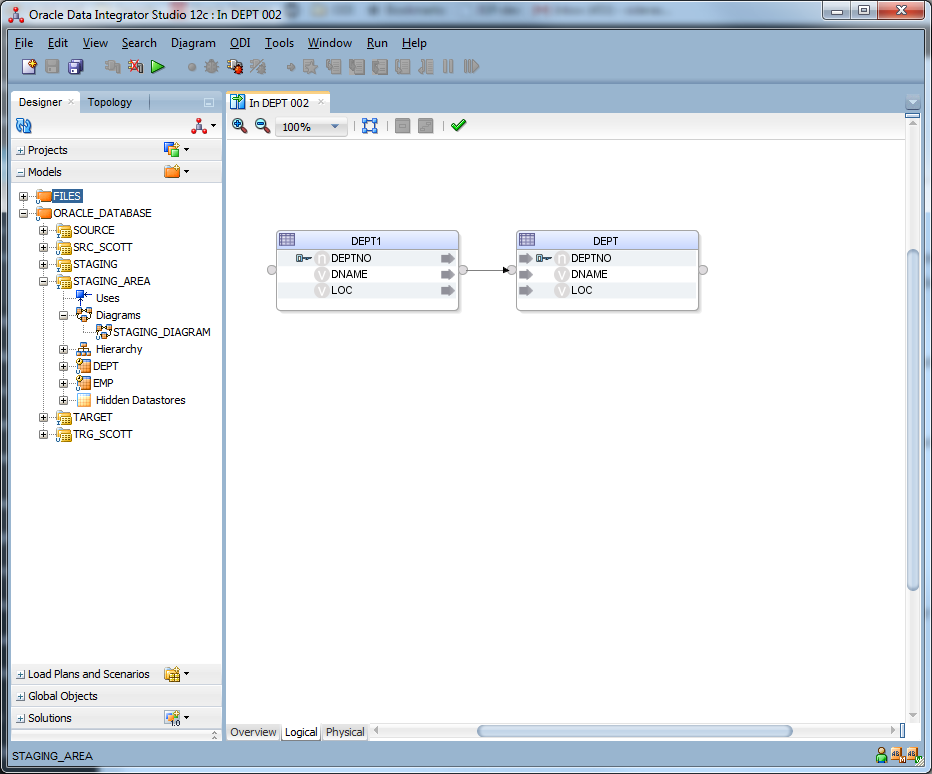
Clicking Ok completes the process and generates the mappings for the selected datastores:
Keep in mind that this solution will rarely fully satisfy your requirements, you will always need to twik and modify the autogenerated objects. It will however help you in kick starting your project, getting familiar with ODI concepts, increasing your productivity and improving quality by avoiding manual tasks.
Further reading:
https://docs.oracle.com/middleware/1212/odi/ODIDG/toc.htm

- Creating Data Models in ODI 12c with Common Format Designer (CFD) - August 13, 2015
- ADF Calendar Implementation - June 5, 2015