The purpose of this tutorial is to setup the necessary environment for development and deployment of Spark applications with Scala. Specifically, we are going to use the Eclipse IDE for development of applications and deploy them with spark-submit. The glue that ties everything together is the sbt interactive build tool. The sbt tool provides plugins used to:
- Create an Eclipse Scala project with Spark dependencies
- Create a jar assembly with all necessary dependencies so that it can be deployed and launched using
spark-submit
The steps presented assume just a basic Linux installation with Java SE Development Kit 7. We are going to download, install, and configure the following software components:
- The latest
sbtbuilding tool - Scala IDE for Eclipse
- Spark 1.4.1
Installation instructions
Installing sbt
sbt download and installation is straightforward, as shown in the commands below:
~$ wget https://dl.bintray.com/sbt/native-packages/sbt/0.13.8/sbt-0.13.8.tgz
~$ gunzip sbt-0.13.8.tgz
~$ tar -xvf sbt-0.13.8.tar
~$ export PATH=$PATH:~/sbt/bin
The last command adds the sbt executable into the PATH shell variable. Now we can call sbt from any directory to create and package our projects. The first time it runs it will need to fetch some data over the internet, so be patient!
We are not quite done with the sbt yet. We need to install two very important plugins.
sbteclipse plugin
sbteclipse is the sbt plugin for creating Eclipse project definitions.
Add sbteclipse to your plugin definition file (or create one if doesn’t exist). You can use either:
- the global file (for version 0.13 and up) at ~/.sbt/0.13/plugins/plugins.sbt
- the project-specific file at PROJECT_DIR/project/plugins.sbt
For the latest version add the following line in plugins.sbt:
addSbtPlugin("com.typesafe.sbteclipse" % "sbteclipse-plugin" % "4.0.0")
as shown below (use ^D to end the cat command):
~$ mkdir -p ~/.sbt/0.13/plugins # mkdir -p creates all necessary directories in the path in the given order
~$ cat >> ~/.sbt/0.13/plugins/plugins.sbt
addSbtPlugin("com.typesafe.sbteclipse" % "sbteclipse-plugin" % "4.0.0")
<ctrl>+D
~$
After installation, the next time we launch sbt we will be able to use the additional command eclipse.
sbt-assembly plugin
sbt-assembly is an sbt plugin that creates a fat JAR of your project with all of its dependencies included. According to Spark documentation, if your code depends on other projects, you will need to package them alongside your application in order to distribute the code to a Spark cluster. This is why we need the sbt-assembly plugin. When creating assembly jars, list Spark and Hadoop as provided dependencies; these need not be bundled, since they are provided by the cluster manager at runtime. Once you have an assembled jar, you can call the bin/spark-submit script as shown later below while passing your jar.
~$ mkdir -p ~/.sbt/0.13/plugins
~$ cat >> ~/.sbt/0.13/plugins/plugins.sbt
addSbtPlugin("com.eed3si9n" % "sbt-assembly" % "0.13.0")
<ctrl>+D
~$
Installing Scala IDE for Eclipse
Downloading and installing the Scala IDE for Eclipse is also straightforward:
~$ wget http://downloads.typesafe.com/scalaide-pack/4.1.1-vfinal-luna-211-20150728/scala-SDK-4.1.1-vfinal-2.11-linux.gtk.x86_64.tar.gz
~$ gunzip scala-SDK-4.1.1-vfinal-2.11-linux.gtk.x86_64.tar.gz
~$ tar -xvf scala-SDK-4.1.1-vfinal-2.11-linux.gtk.x86_64.tar
~$ ~/eclipse/eclipse # this runs Eclipse IDE
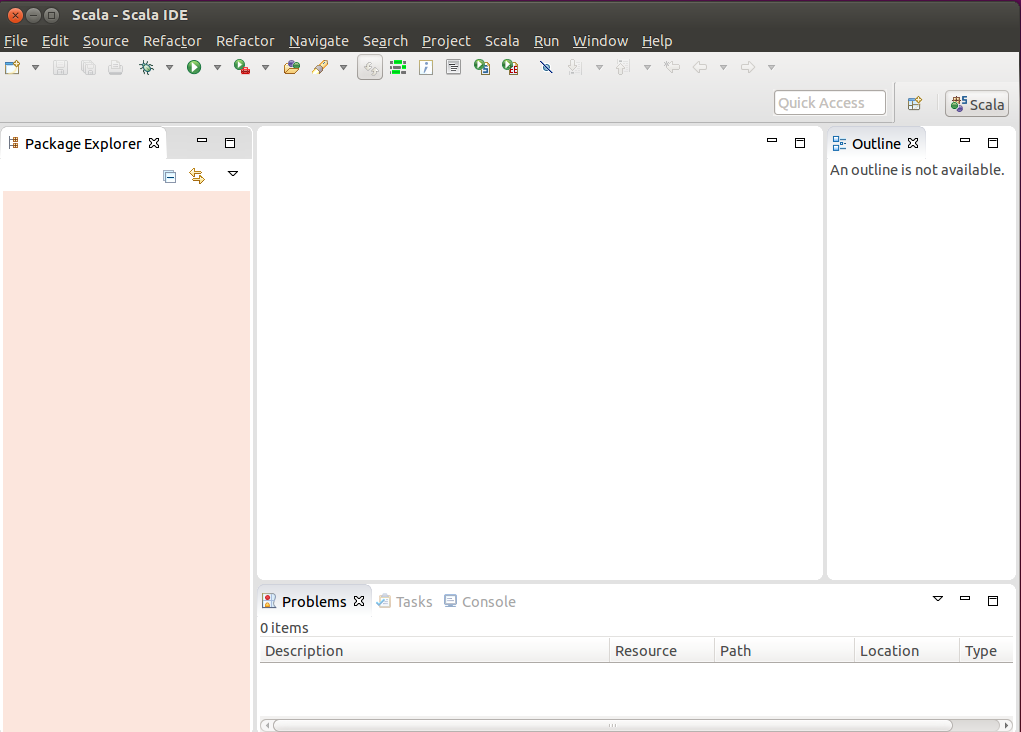
As you can see from the figure below, a new menu item named Scala is added in the classic Eclipse menu bar:
Installing Spark 1.4.1 (this may take a while)
Instructions for downloading and building Spark are provided here. There are several options available; since Spark is packaged with a self-contained Maven installation to ease building and deployment of Spark from source (located under the build/ directory), we choose this option. Notice that we build Spark with the latest Scala 2.11 (included in the Eclipse Scala IDE we have just downloaded in the previous step):
~$ wget http://www.apache.org/dyn/closer.cgi/spark/spark-1.4.1/spark-1.4.1.tgz
~$ gzunip spark-1.4.1.tgz
~$ tar -xvf spark-1.4.1.tar
~$ cd spark-1.4.1/
~spark-1.4.1/$ build/mvn -Pyarn -Phadoop-2.4 -Dhadoop.version=2.4.0 -Dscala-2.11 -DskipTests clean package
...
...
~spark-1.4.1/$ export PATH=$PATH:~/spark-1.4.1/bin # make all Spark binaries accessible
As with sbt above, we include the last command so as to make Spark binaries accessible from everywhere.
Having installed all the necessary components, we now proceed to demonstrate the creation of a simple application.
Creating a sample application (sbt package)
The task now is to create a self contained Scala/Spark application using sbt and the Eclipse IDE.
Creating sample sbt project
For this demonstration, we will create a very simple Spark application in Scala named SampleApp (creating a realistic application will be covered in a follow-up post). First we prepare the directory structure:
~$ mkdir SampleApp
~$ cd SampleApp
~/SampleApp$ mkdir -p src/main/scala # mandatory structure
In the directory~/SampleApp/src/main/scala we create the following Scala file SampleApp.scala (using just a text editor for now):
/* SampleApp.scala:
   This application simply counts the number of lines that contain "val" from itself
 */
import org.apache.spark.SparkContext
import org.apache.spark.SparkContext._
import org.apache.spark.SparkConf

object SampleApp {
  def main(args: Array[String]) {
    val txtFile = "/home/osboxes/SampleApp/src/main/scala/SampleApp.scala"
    val conf = new SparkConf().setAppName("Sample Application")
    val sc = new SparkContext(conf)
    val txtFileLines = sc.textFile(txtFile , 2).cache()
    val numAs = txtFileLines .filter(line => line.contains("val")).count()
    println("Lines with val: %s".format(numAs))
  }
}
In the directory ~/SampleApp we create a configuration file sample.sbt containing the following:
name := "Sample Project"

version := "1.0"

scalaVersion := "2.11.7"

libraryDependencies += "org.apache.spark" %% "spark-core" % "1.4.1"
The resulting directory structure should be as shown below:
osboxes@osboxes:~/SampleApp$ find .
.
./sample.sbt
./src
./src/main
./src/main/scala
./src/main/scala/SampleApp.scala
Use sbt to package and launch the sample application
We are now ready to package everything into a single jar and deploy using spark-submit. Notice that the sbt tool creates a hidden directory in the home folder ~/.ivy2/ that contains all cached jars used for packaging the application.
~/SampleApp$ sbt package
...
[info] Loading global plugins from /home/osboxes/.sbt/0.13/plugins
[info] Set current project to Sample Project (in build file:/home/osboxes/SampleApp/)
...
...
[info] Compiling 1 Scala source to /home/osboxes/SampleApp/target/scala-2.11/classes...
[info] Packaging /home/osboxes/SampleApp/target/scala-2.11/sample-project_2.11-1.0.jar ...
[info] Done packaging.
[success] Total time: 15 s, completed 30-Jul-2015 18:55:17
~/SampleApp$
Notice that the result of the packaging is the file sample-project_2.11-1.0.jar. This is deployed as follows:
~/SampleApp$ spark-submit --class "SampleApp" --master local[2] target/scala-2.11/sample-project_2.11-1.0.jar
...
...
Lines with val: 6
~/SampleApp$
We can easily verify that the number of lines in our simple script containing “val” are indeed six (five val assignments plus one occurrence in the println command argument).
Use sbt to create an Eclipse project
In order to create an Eclipse project for this sample application, we issue the following sbt command:
~/SampleApp$ sbt eclipse # this choice was installed with the sbteclipse plugin
[info] Loading global plugins from /home/osboxes/.sbt/0.13/plugins
[info] Set current project to Sample Project (in build file:/home/osboxes/SampleApp/)
[info] About to create Eclipse project files for your project(s).
[info] Successfully created Eclipse project files for project(s):
[info] Sample Project
~/SampleApp$
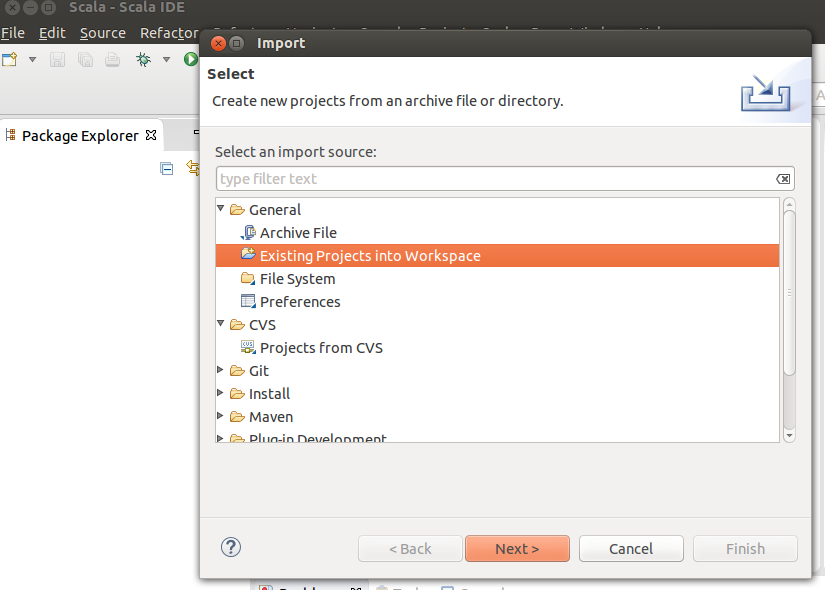
Now the Eclipse project is created inside the ~/SampleApp directory. We use Eclipse to import an existing project:
Select Browse to seach for the ~/SampleApp directory.
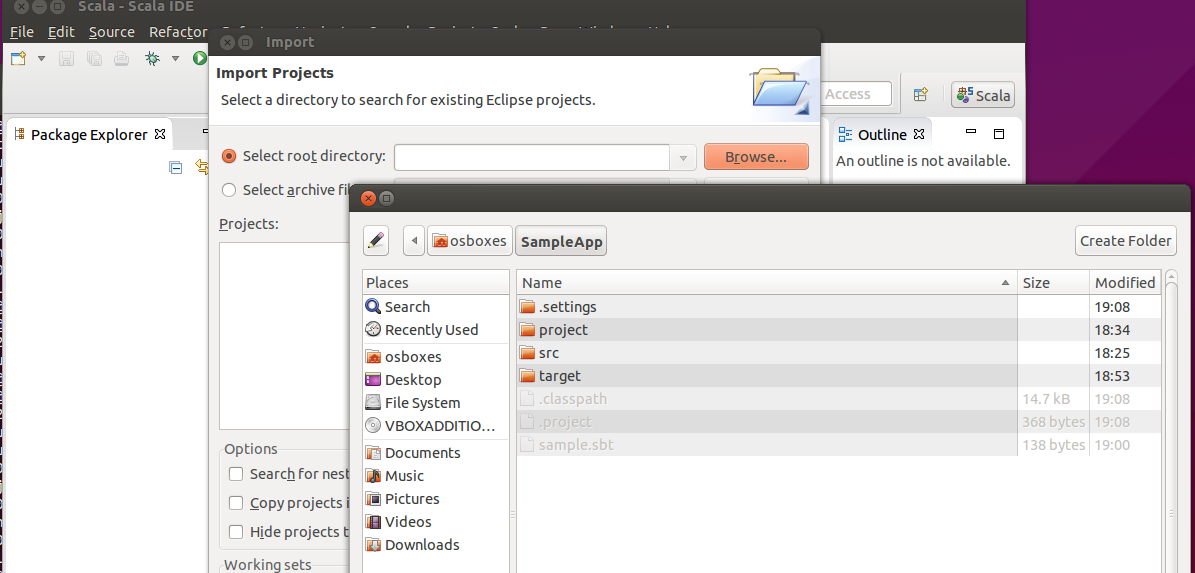
Do not check the option Copy projects into workspace
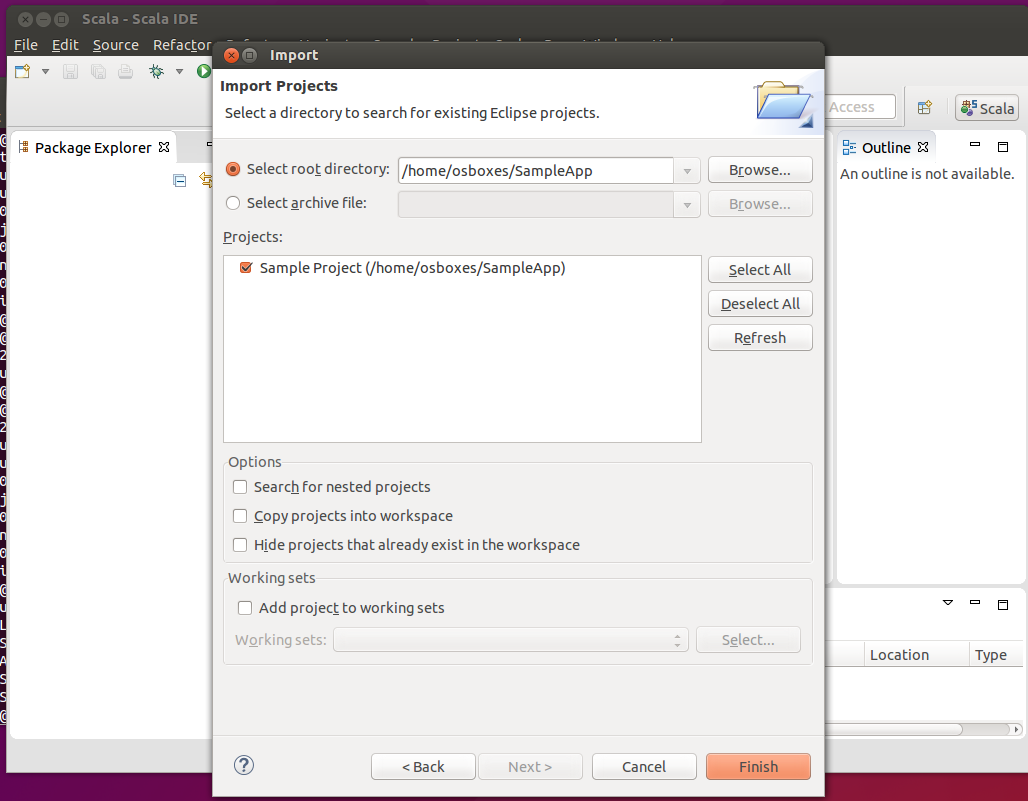
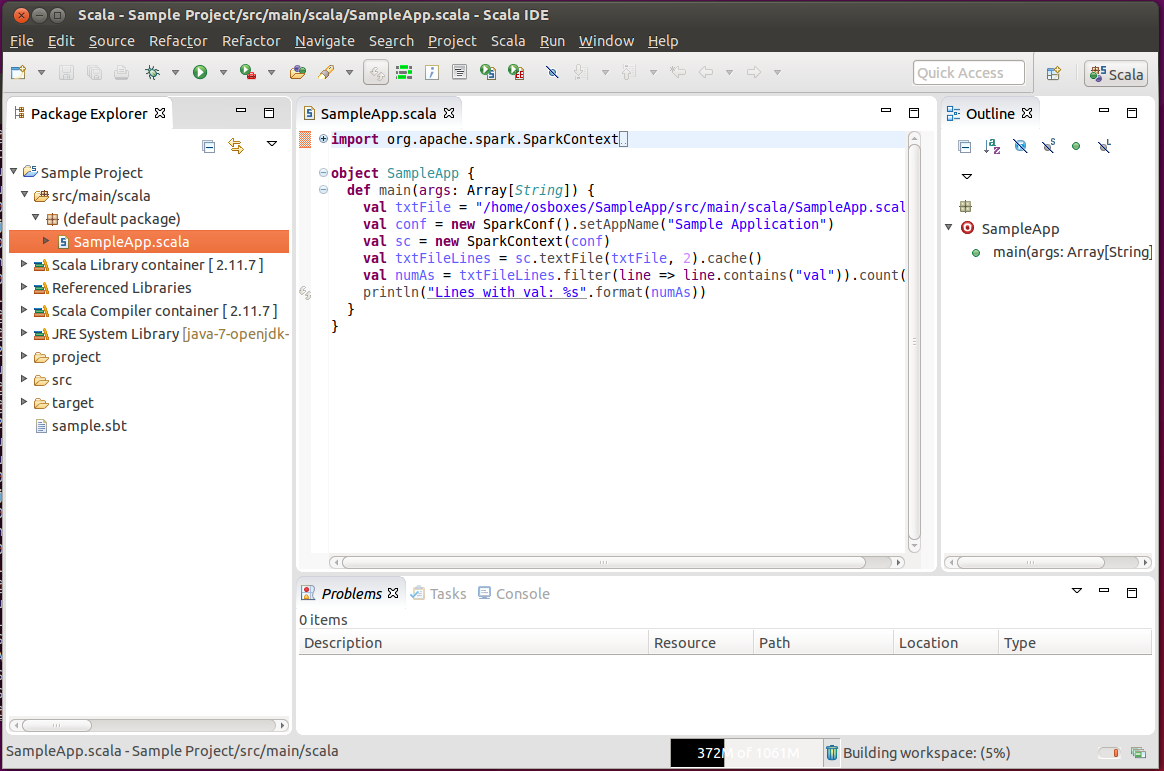
The result is the complete project tree in the Package Explorer of Eclipse. All Spark and Hadoop related dependencies have been automatically imported from sbt. Now you can edit SampleApp.scala directly from Eclipse using code completion features, syntactic highlighters and more.
Run the sample application from Eclipse
Source code editing using Eclipse can be real fun! Code completion, refactoring, smart indenter, code formatting, syntax highlighting – you name it, Eclipse provides it! But what about running the application? We can do that too, with a little configuration and a minor addition in the Scala source code.
From the Eclipse menu bar select Run -> Run Configurations. On the left panel right click on Scala Application and select New. This opens the Create, manage, and run configurations window:
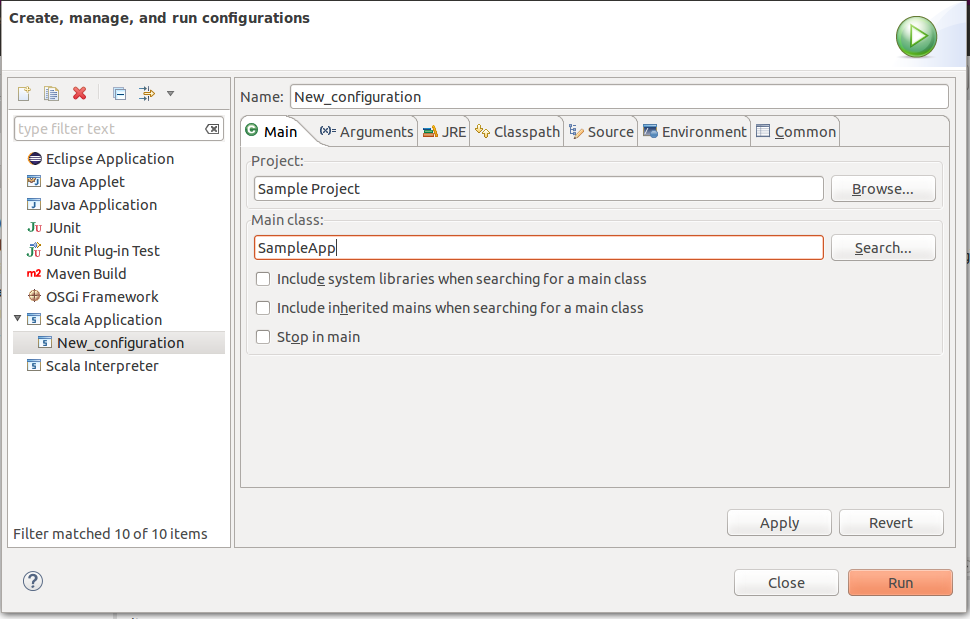
Enter the name of the class we want to deploy – in this case it is SampleApp. Then press Apply and the run configuration is ready to go. The last step is to modify the source code to reflect the Spark runtime configuration. In this example it suffices to set the master URL for launching to "local[2]". This will run the application locally in a standalone mode.
val conf = new SparkConf().setAppName("Sample Application").setMaster("local[2]")
Now we are ready to launch the application from Eclipse by selecting Run->Sample Application:

From this point onwards, we can use the Eclipse IDE to further develop our application and run some test instances during the process. When we are confident with our code, we can switch to sbt packaging/deployment and run our application in systems containing a Spark 1.4.1 installation. The developing cycle can be as follows:
- Use Eclipse to modify the project and test it
- Use the
sbt packageto create the final jar - Deploy using
spark-submit - Go to step 1, if necessary, and refine further
Recap
We have presented a walkthrough tutorial on how to seamlessly develop and deploy a simple Spark/Scala application using Eclipse and the sbt tool, including the installation and configuration of all software components needed. The tutorial was run on an Ubuntu 15.04 (x64) virtual machine. No assumptions were made for the required software other than Java SE Development Kit 7.
In a follow-up post, we will present in similar detail the development and deployment of a more realistic application, demonstrating how to include dependencies on other Spark libraries (namely MLlib for machine learning), as well as dependencies on external Scala libraries.
For simplicity, development and deployment were both launched in the same virtual machine. Deployment on a different cluster could possibly be the subject of a future post.
Finally, we expect that the steps presented above will be useful also for developers wishing to use Java and Eclipse for developing Spark applications. This is also something that we may cover in detail in a future post.
- Nonlinear regression using Spark – Part 2: sum-of-squares objective functions - October 31, 2016
- How to evaluate R models in Azure Machine Learning Studio - August 24, 2016
- Nonlinear regression using Spark – Part 1: Nonlinear models - February 10, 2016
Thanks a lot. Great job.
[…] Blog Development and deployment of Spark applications with Scala, Eclipse, and sbt – Part 2: A Recommender System […]
EXACTLY the tutorial I’ve been looking for… Way to go Constantinos, thank you!
Helped me a lot.., thank you
The sc.textFile directly goes to hdfs
How to load a file from a local file system without using hdfs?
Could you elaberate on setting the configuration files and setting the env variables?
Thank you very much. I am really glad that you find this post useful.
Regarding sc.textFile() you can append the “file://” in the beginning of the file location string “file:///home/osboxes/SampleApp/src/main/scala/SampleApp.scala”.
This will instruct Spark to load the file from the local file system.
For the configuration files and environment variables I use the default settings that come with the installation of Spark 1.4.1.
$ build/mvn -Pyarn -Phadoop-2.4 -Dhadoop.version=2.4.0 -Dscala-2.11 -DskipTests clean packageI believe that earlier versions of Spark search in the “hdfs://” domain by default and need “file://” preamble to locate files in the local system.
First, thanks a lot for this great post.
I am having some trouble when executing the .jar:
sergio@novelda:~/SampleApp$ spark-submit –class “SampleApp” –master local[1] target/scala-2.11/sample-project_2.11-1.0.jar
Picked up JAVA_TOOL_OPTIONS: -javaagent:/usr/share/java/jayatanaag.jar
Picked up JAVA_TOOL_OPTIONS: -javaagent:/usr/share/java/jayatanaag.jar
java.lang.ClassNotFoundException: SampleApp
at java.net.URLClassLoader.findClass(URLClassLoader.java:381)
at java.lang.ClassLoader.loadClass(ClassLoader.java:424)
at java.lang.ClassLoader.loadClass(ClassLoader.java:357)
at java.lang.Class.forName0(Native Method)
at java.lang.Class.forName(Class.java:348)
at org.apache.spark.deploy.SparkSubmit$.org$apache$spark$deploy$SparkSubmit$$runMain(SparkSubmit.scala:634)
at org.apache.spark.deploy.SparkSubmit$.doRunMain$1(SparkSubmit.scala:170)
at org.apache.spark.deploy.SparkSubmit$.submit(SparkSubmit.scala:193)
at org.apache.spark.deploy.SparkSubmit$.main(SparkSubmit.scala:112)
at org.apache.spark.deploy.SparkSubmit.main(SparkSubmit.scala)
Using Spark’s default log4j profile: org/apache/spark/log4j-defaults.properties
15/09/11 15:27:43 INFO Utils: Shutdown hook called
Do you know something about this?
Thanks again
Thank you very much Sergio!
One logical explanation would be if you missed (or misspelled) the proper path hierarchy.
./src/main
./src/main/scala
./src/main/scala/SampleApp.scala
Can you also try:
spark-submit –class “src.main.scala.SampleApp” –master local[1] target/scala-2.11/sample-project_2.11-1.0.jar
I will try to reproduce this situation.
All the best!
Costas
Hi Costas,
I managed to reproduce and find the issue: There’s a typo in line 8 of your sample code. You wrote “object SimpleApp”, it should be “object SampleApp”, instead. Once fixed, it works.
I hope it helps.
All the best.
Miguel Peralvo
Hi Miguel,
Thank you very much for your correction. Indeed the correct object name is “SampleApp”.
If “SimpleApp” is used as object name then the submit line should be changed to
spark-submit --class "SimpleApp" --master local[2] target/scala-2.11/sample-project_2.11-1.0.jarProbably most people would correct that on the spot, but thankfully your comment now
cleared this once and for all!
All the best,
Costas
Problem solved! thanks a lot
After searching in vain, I finally came across this post and it saved my day, thank you for this useful tutorial. I have followed this tutorial and everything worked perfect. Now, I want to import spark projects in to Eclipse as Scala projects. Spark already has this set up so that I just ran \”sbt eclipse\” and after waiting for what felt like eternity, it successfully created all project files. However, when I try to import any of the projects into Eclipse, I\’m getting this error: An internal error occurred during: \”Update Scala Installation from raw classpath for spark-core\”. Exception… Read more »
It seems you read my mind. I was looking exactly for the same stuff. Thanks.
hey guys i m stuck at the point where “sbt package” command doesnt work for me..
anoopn@uf8bc12a3d82b569f30e8:~/scala/spark-1.4.1/SampleApp$ sbt package
No command ‘sbt’ found, did you mean:
Command ‘skt’ from package ‘latex-sanskrit’ (main)
Command ‘sb2’ from package ‘scratchbox2’ (universe)
Command ‘sbd’ from package ‘cluster-glue’ (main)
Command ‘mbt’ from package ‘mbt’ (universe)
Command ‘sbmt’ from package ‘atfs’ (universe)
Command ‘lbt’ from package ‘lbt’ (universe)
Command ‘st’ from package ‘suckless-tools’ (universe)
Command ‘sb’ from package ‘lrzsz’ (universe)
sbt: command not found
can anyone pls help me resolve this issue and guide me to complete the setup.
thanks
Anoop
Probably you missed the step that adds sbt to the execution path.
~$ export PATH=$PATH:~/sbt/bin
You can find these instructions in the beginning of the post in the “Installing sbt” section.
All best,
Costas
Thanks
This helped a lot
Thank you so much! I’ve been struggling with this for hours.